
For those of you just starting out with AppSense Management Suite, here’s a quick guide on how to install it in a fairly simple configuration.
I used my home lab for this test in which I provisioned a Windows 2008 R2 Server running on a VMWare Workstation platform. I am going to use a single server to be both the database server and the management server, although normally in an enterprise deployment I would recommend splitting these roles onto two separate systems and taking steps towards some sort of redundancy, particularly if Personalization Server was going to be used. I have assigned 2GB of RAM and 2 CPUs to the server which if I am being honest is possibly a little underpowered in the memory stakes, 4GB would probably be better.
The AppSense Management Suite comes as a single zip file which I am going to extract to a folder on the server desktop for the purposes of this demonstration, normally I would recommend that the source files are stored on a network share.
Once unzipped, run
setup.exe from the install files with administrative privileges

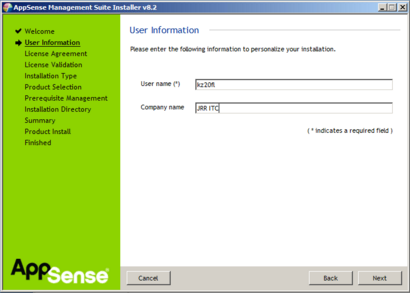
Click on
Next to continue, and then enter a user name (required) and an optional company name
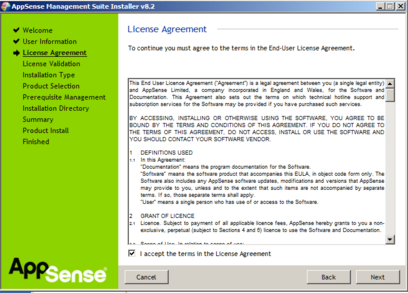
Click on
Next to continue, and check the box to confirm you accept the License Agreement
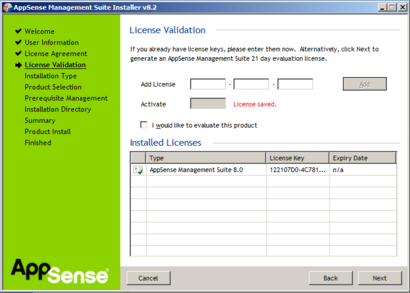
Click
Next, then enter your license key and activation code, and then click
Add. Alternatively, to start a trial period, check the box for
I would like to evaluate this product.
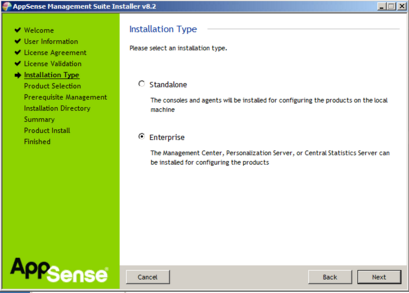
Click
Next
, then set the
Installation Type
to Enterprise. Standalone configurations are generally not used unless in POC situations where available machines are at a premium
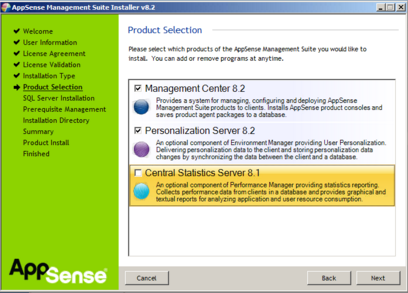
Click
Next, then select the product features you would like to install. We have deselected the Central Statistics Server feature for this example, but we will be adding it to the installation at a later date when I can cover it more thoroughly.
Click
Next
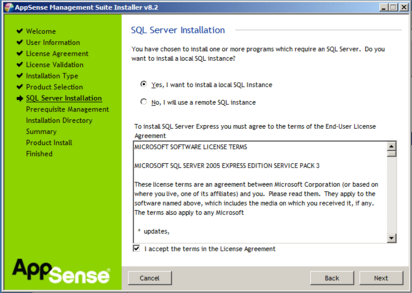
, then you will be prompted to choose a local or remote SQL instance. In this example we are going to use a local instance, so we must accept the Microsoft license agreement for SQL Server 2005 Express. If available, the usage of a dedicated remote SQL instance would be the recommended configuration.
Click
Next to continue. The installer will now verify whether your system needs any prerequisites installing. Click on the
Install All link if you have multiple prerequisites to install.
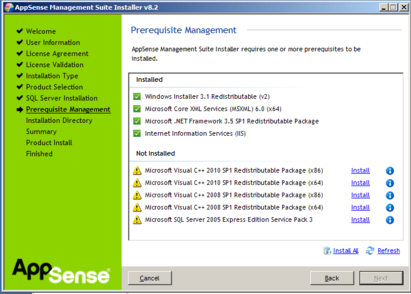
You will need to click on
Run for each prerequisite that downloads and installs, when this part has completed, click
Next to continue.
You will now need to select your installation directory. In this example we are happy with the default location on the system drive

Click
Next to continue. You will then be presented with an installation summary screen, if everything appears OK, click on
Install to start the installation.
When the installation is completed you will see the following screen
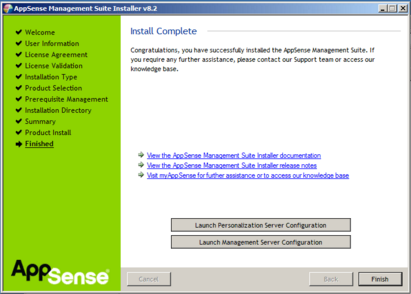
Congratulations, you’ve successfully installed the AppSense Management Suite! However, our work is only half done – now we need to move on to configuring the installation. The configuration steps will be covered in my post for tomorrow,
How To Configure AppSense Management Suite
.

