
I still get the odd email from people asking how to set up a simple Performance Manager configuration. It seems that Performance Manager tends to be the part of the Management Suite AppSense administrators are least likely to tinker with – particularly as a misconfigured setting could possibly adversely affect a lot of users on shared SBC systems like XenApp and RDS. However, you can use it to increase the user density on your systems, so it’s got to be worth at least trying to configure it!
In a nutshell, AppSense Performance Manager allows administrators to precisely manage the allocation and distribution of system resources such as CPU, memory and disk for users and applications. It includes automated application memory optimization to reduce page file usage and CPU thread throttling to control demand of resources to ensure efficient and smooth running of a system. Performance Manager also, in keeping with the hallmarks of the AppSense Management Suite, provides fine level granular management by allowing allocation of resources based on the state of the session, applications or desktop. Testing done recently using it showed that implementing AppSense Performance Manager on a VDI solution reduced overall CPU utilization by approximately 10%, and I’ve heard tell of instances where SBC environments increased their user density by up to 40%.
Performance Manager is markedly different to Environment Manager in that less is definitely more. You should only manage and restrict applications if there’s a definite need for it. Otherwise configuring it with some basic default settings should suffice. AppSense have done a good job of defining some best practice guidelines and providing a very simple basic configuration on their website – I am going to cover those areas quickly here and also run through an example of restricting a particular application for a particular AD group.
Basic configuration
The first part you should look at when creating your Performance Manager configuration is the Options area. Performance Manager, more than any other part of the Management Suite, is very sensitive to the configuration options defined here. AppSense recommend that unless you have an atypical environment (and let’s be clear here, we are talking about primarily SBC, which means mainly RDS and XenApp systems) that the Options section should be configured as shown below
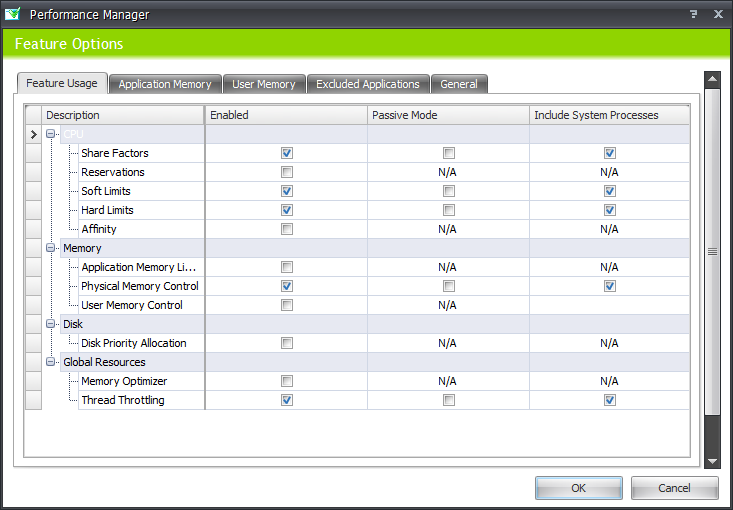
Share factors should be enabled as these allow specific groups, users or applications to be allocated a larger “share” of the CPU resource. This is very handy for SBC systems.
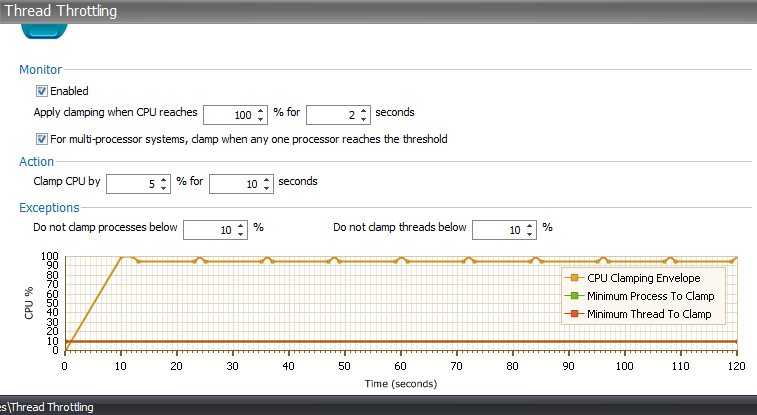
Finally, Thread Throttling should be enabled for both user and system processes. On any Windows platform, this should provide an appreciable benefit. The recommended settings for Thread Throttling are shown below – you can tweak this if you so require.
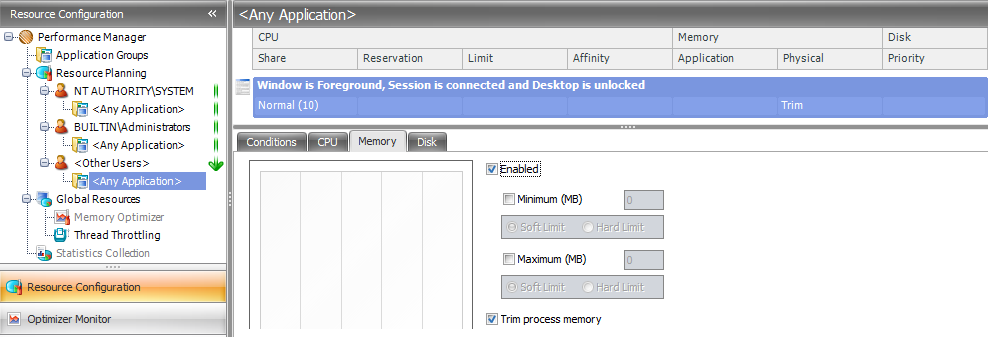
Once you’ve got these options configured, you will have the basis of a simple configuration that should hopefully be able to make a difference even in this basic format. One thing you may want to additionally do is go to the <Other Users> <Any Application> section and enable memory trimming on the Memory tab, by checking the Enable and Trim Process Memory boxes (shown below).
Now we could stop here and say this is a good base for any Performance Manager configuration, but frankly this would be only going as far as AppSense’s best practice documents go, so it would be prudent to try and add a little bit more value to this post 🙂
Adding target groups
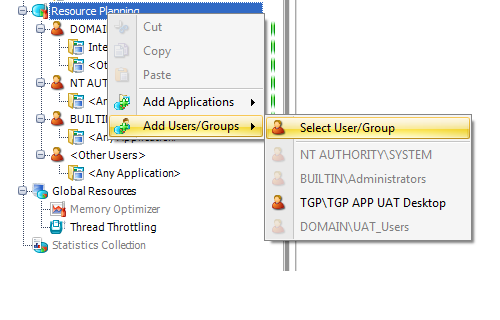
Now, in this example we will only be looking to manage a particular application for a particular user group. Maybe a certain set of users work on a browser-based app that keeps monopolizing CPU and/or physical memory, so we want to restrict it. To add a group for management, we right-click the Resource Management section and choose Add Users/Groups | Select User/Group
You can browse the domain/computer for the required users or groups, or simply enter the name manually. We add our AD group and click OK, and it appears under the Resource Planning heading on the left.
Adding application groups to user groups
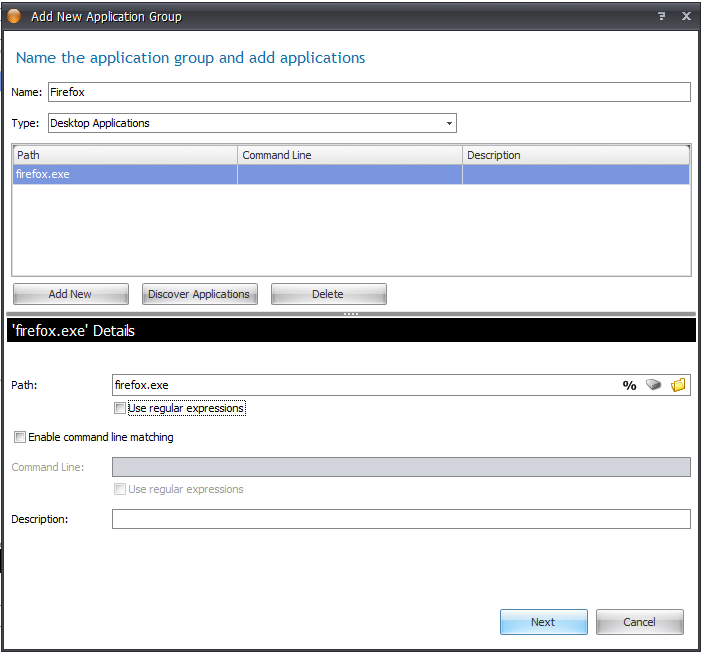
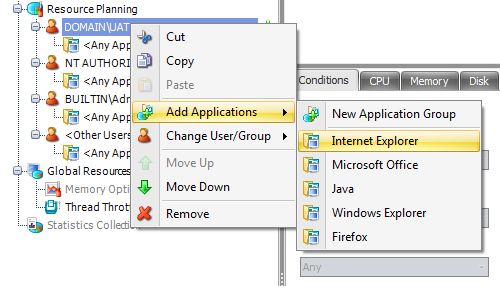
Next we right-click the user group we have added and choose Add Applications. We can select the application or application group that we have created. In this case, we will add Internet Explorer as we are looking to manage the performance of iexplore.exe for this particular AD group.
At this point we could add various Rules to change the behaviour of Performance Manager towards this application based on configurable factors such as windows position, session state, etc., but we are going to keep things simple and manage it with the Default Rule, which will apply at all times the process is running for this group.
Configuring actions for the application
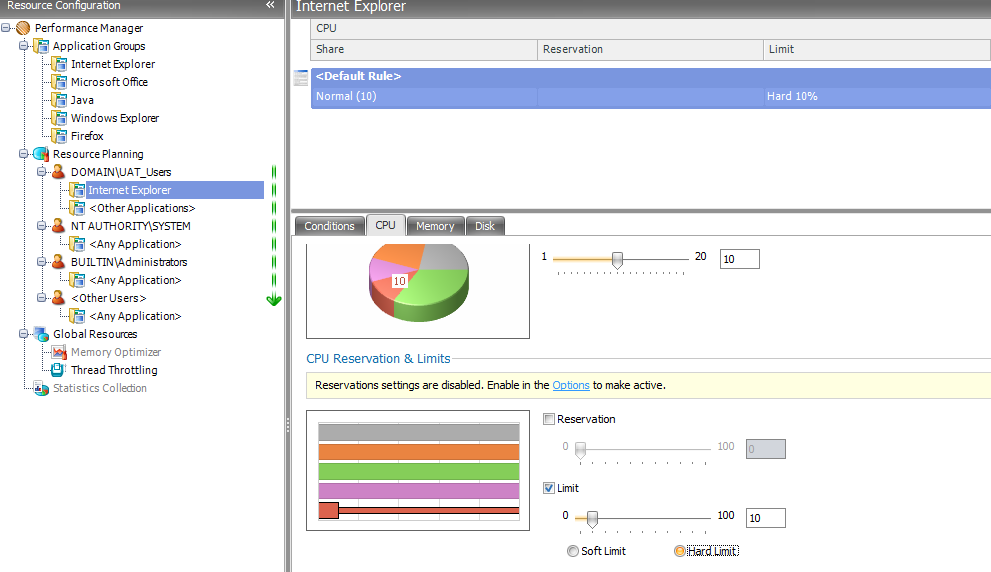
We want to stop iexplore.exe from using up all of the available CPU resources. We will first go to the CPU section and enable the Limit for the application and set it to 10%. Note you can choose Hard or Soft limits. Soft limits only apply when the system is running under heavy load (i.e. the requested CPU time from all processes on the CPU exceeds 100%). Hard limits apply globally – which means the process is always limited to the set amount of CPU regardless of the server load. In this example we will set a Hard limit.
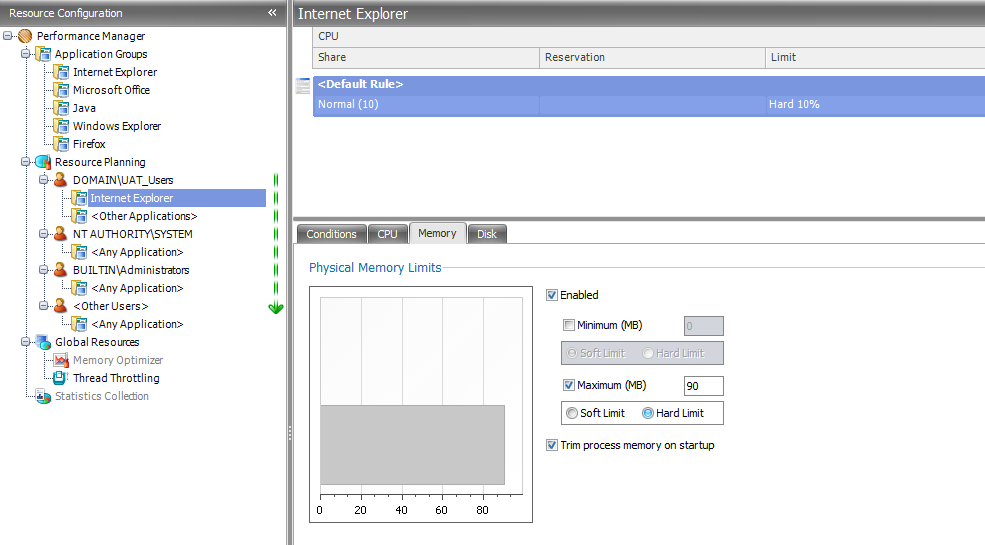
So now, when users from the specified AD group run the Internet Explorer process on my XenApp or RDS system, the Performance Manager agent will limit them to using 10% of the CPU and 90MB of memory, hopefully curtailing the performance issues that have arisen from this unreliable browser-based application the group uses.
That covers a very simple setup of Performance Manager, and how to add groups and applications for specific attention. Don’t forget, though, that you should only specifically restrict applications if their performance is shown to be affecting the stability or performance of sessions. Don’t just restrict them “because you can”. Even with only the global Options configured as shown above PM should still positively increase the performance of your systems, so remember that you should only get more precise if absolutely necessary – and don’t forget to thoroughly test all of your application functionality on a test group before sending it fully live!
Config available – the configuration we used in this post is available for download here if anyone’s interested, obviously the group name will not be valid in a different environment 🙂

